


Winchester X-150 free floating the barrel
2 posters

Winchester X-150 free floating the barrel
![]() by FrontierGander 23/12/2021, 4:49 pm
by FrontierGander 23/12/2021, 4:49 pm
For about 4 years i owned a Winchester X-150 50cal inline muzzleloader and that muzzleloader could do amazing things after i free floated the barrel.
If you have one of these rifles or even a cva magbolt,hunterbolt, or even a bolt action muzzleloader, this should easily help improve your accuracy.
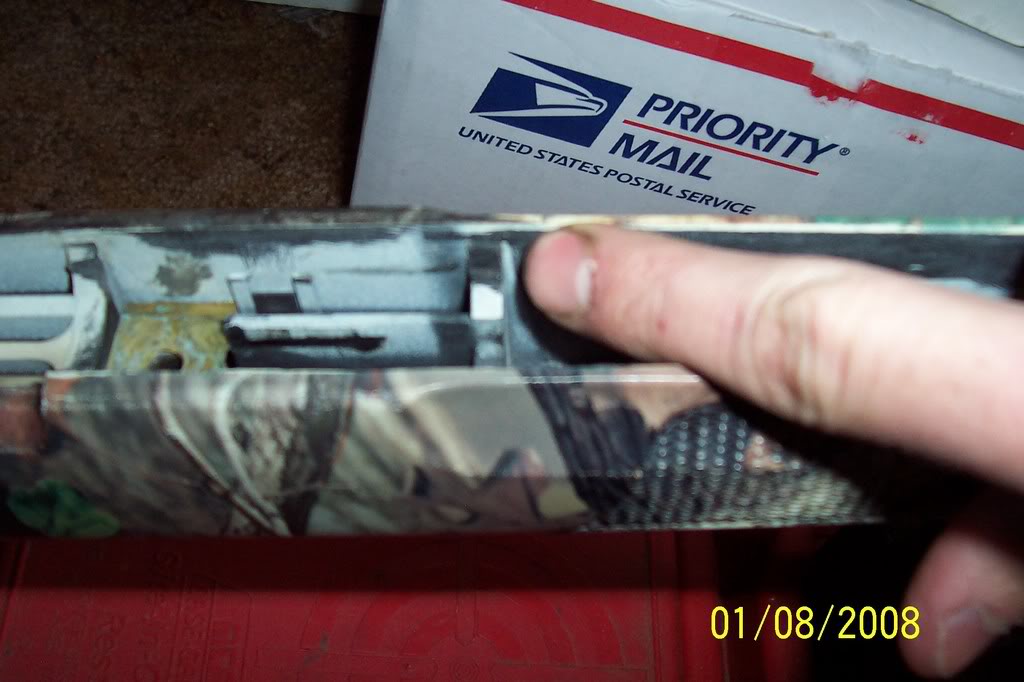
First off, Take your rifle, have either a roll of scotch tape or a black magic marker " Removes easily with windex" Look along the sides of the barrel and mark ALL material thats touching up against the sides of the barrel. All material that touches the barrel needs to be removed all the way up the the first barrel lug.
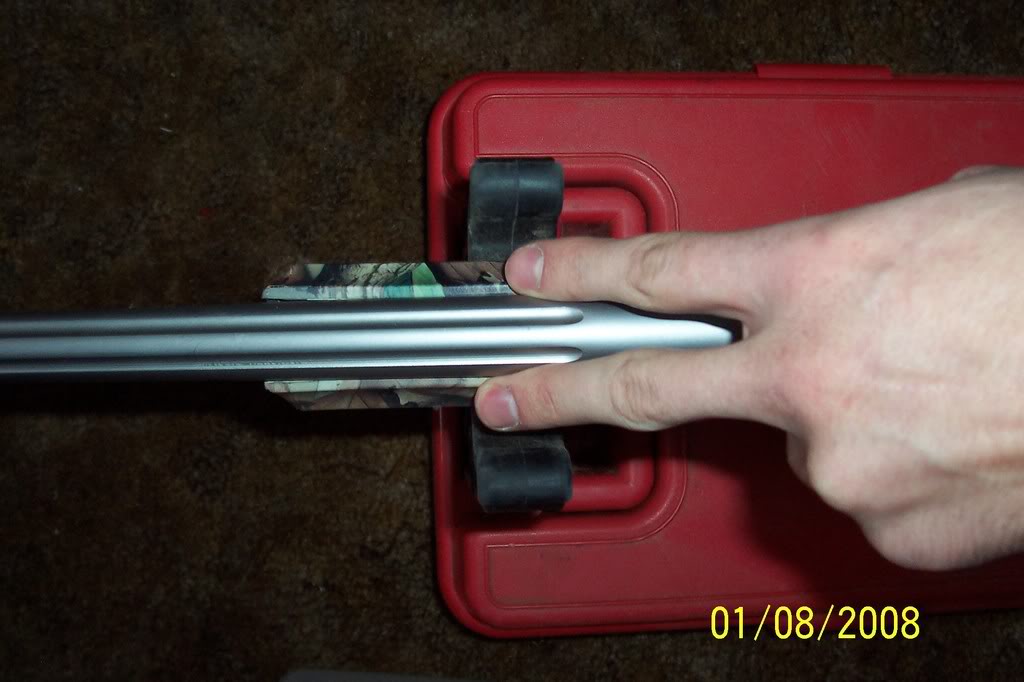
Once you've marked the areas that need to be taken down, Remove your barrel. look along your barrel for shiney markings. This is caused by the stock material rubbing up against the barrel. By removing this excess material, You'll remove the pressure thats pushing up against the barrel that leaves these ugly marks.
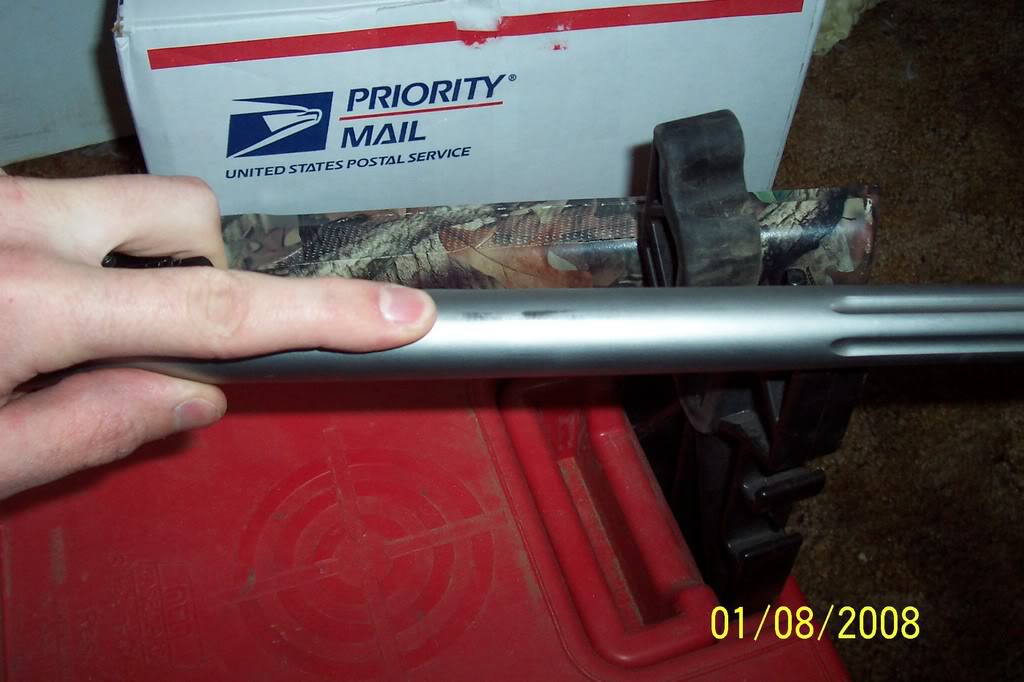
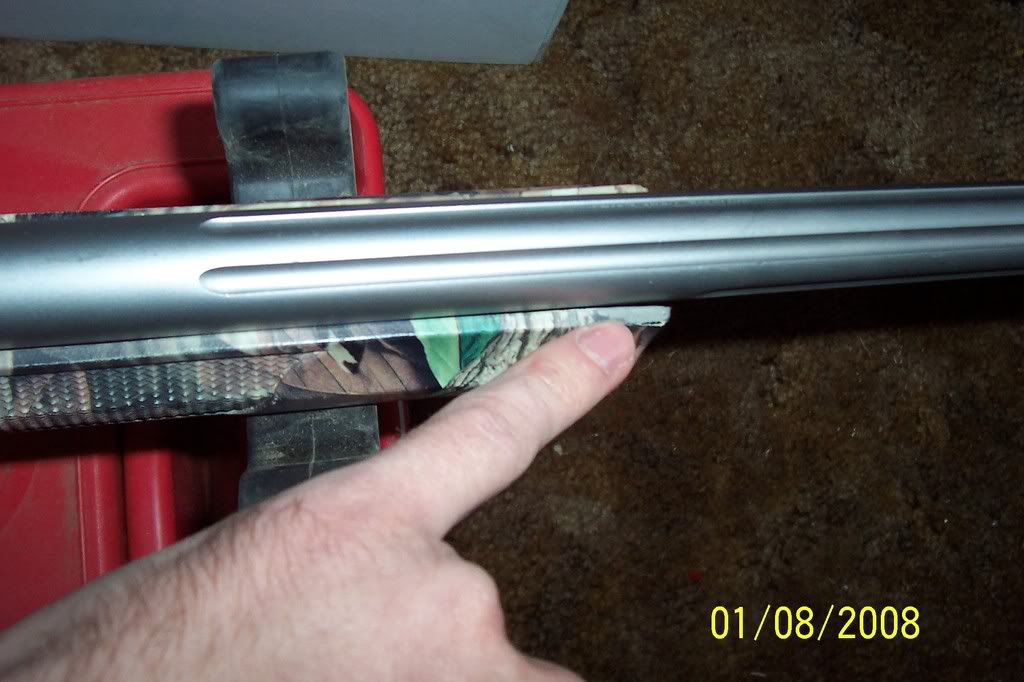
Black area is the paint/material that i removed. Its better to remove the material evenly so you have a nice clean gap alone the side of the barrel. It doesnt take much filing at all to get the built up material off. Go slowly so it looks clean.
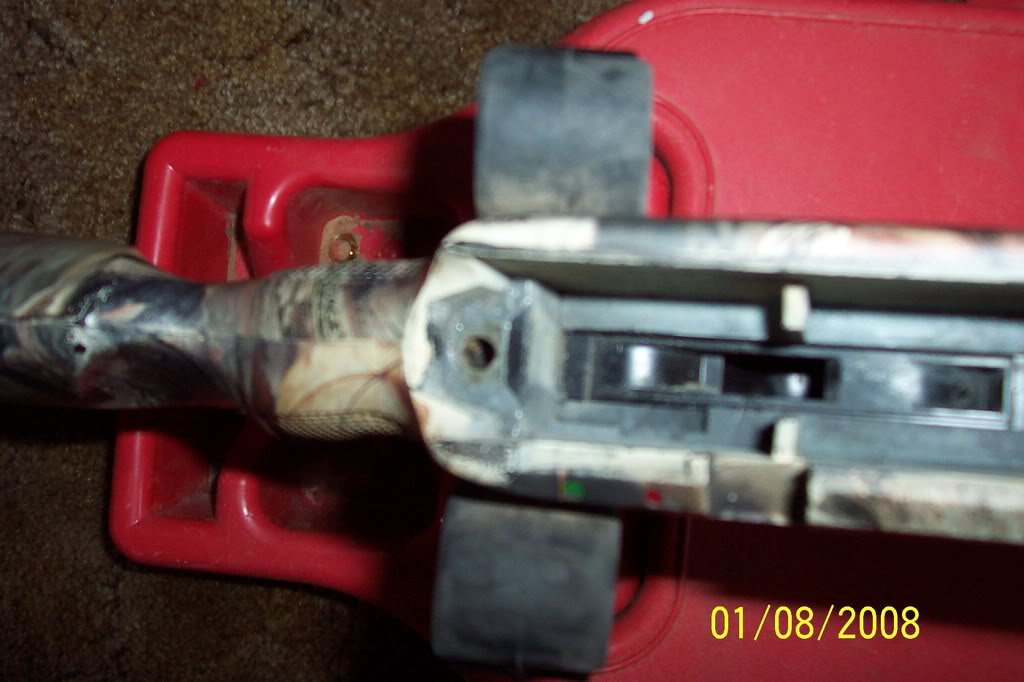
Pictured below is what i'll call "barrel supports" From the factory, the barrel is pressed up against on these and just sits on them. File these down! These cause nothing but headaches and are of no use. On these, you'll need to take off around the thickness of a penny.
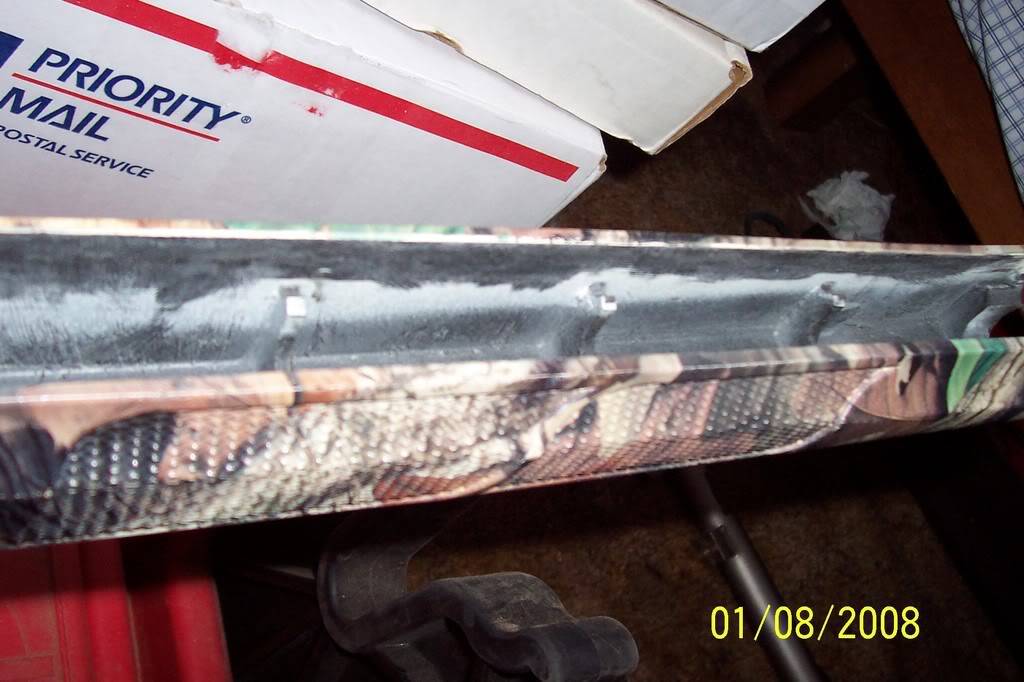
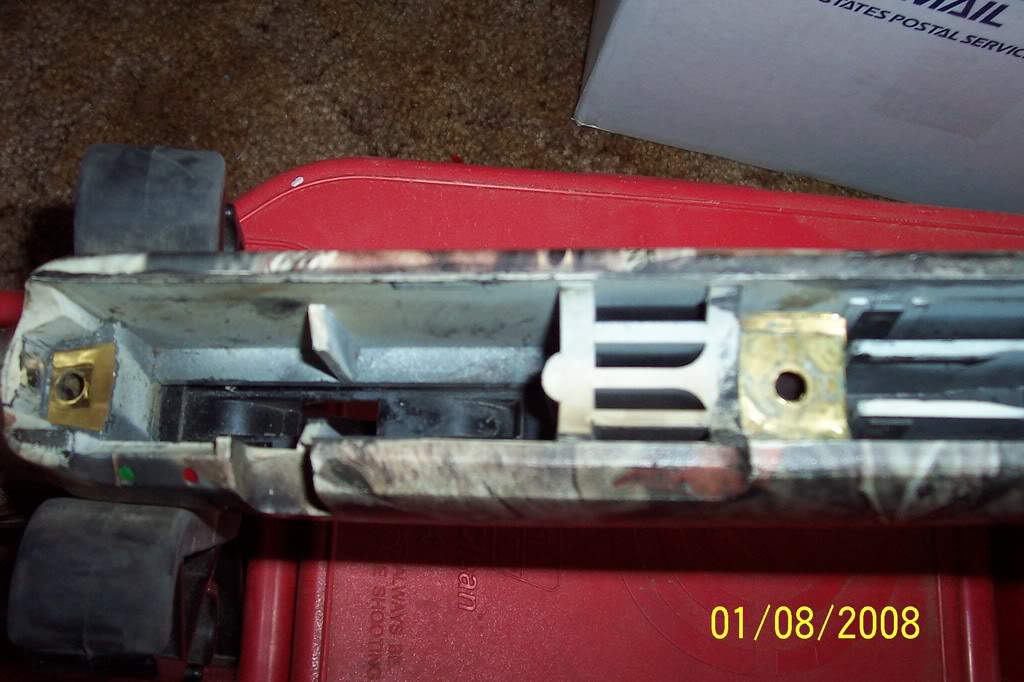
Rear Barrel Lug: Does yours have a Square imprint of the barrel lug? If so, You'll need to buy a little JB weld, Mix it up good, And use a tiny screw driver and just carefully filly that square impression and around the entire area. I like to do the entire area as pictured for extra support. If you do not fix this area, The barrel lug will continue to eat into the stock and will case your groups to be in a vertical line.
Dont worry about closing up the hole. You can always use a drill bit and clean it up. You dont need to build it up alot, Just get it flush with the original stock material.
Use a knife to rough up the area so the jb weld has something to grab on to and hold.
Next i simply used a Soda can and used the aluminum as my shimming material, works perfect! Use scissors and cut the shims out to fit tightly into the lug area and use a small dab of rubber cement in each corner to hold them in place.
I use 1 shim in the rear, and 2 shims up front. Remember that the JB weld will take up a little room and depends on how thick you put the jb weld on.
Cut out more shims than you'll need.
Pictured below is engine bearing shim i originally used, This did not hold up no where near as good as the soda can, but was all i had at the time.
Once you get the stock filed, JB welded, <--- let the JB weld dry for atleast 2 days to insure its properly dry.
Take the barrel and place it into the stock with NO shims. Grab a piece of paper and slide it down between the stock and barrel, Take note of tight areas. If the paper does not slide down, Remove the stock, Add One shim to the front and rear lugs. Redo paper test. It should take between 2-3 shims on the front lug and 1-2 shim in the rear. Do NOT crank down hard on the lug bolts, These only need to be snug.
Don't let all this scare you off, Its very simple to do and just requires a little time and very little work.
Keep it simple and start off with marking the areas where material is touching.
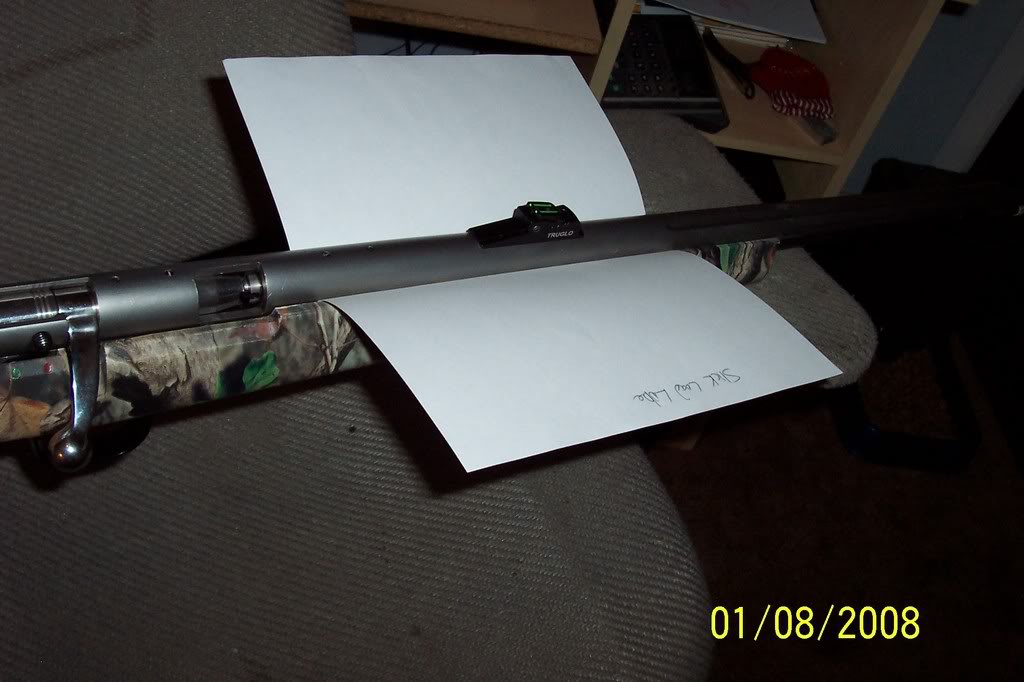
Finished result was a Winchester X-150 .50cal that went from shooting 2 1/2" groups with 385 grain Hornady great plains, to a common 5/8" group @ 100 yards with open sights.
Pictured below is the last target i shot with 90 grains pyrodex p and a 410 grain Great plains conical @ 100 yards and truglo fiberoptic sights.
If you have one of these rifles or even a cva magbolt,hunterbolt, or even a bolt action muzzleloader, this should easily help improve your accuracy.
First off, Take your rifle, have either a roll of scotch tape or a black magic marker " Removes easily with windex" Look along the sides of the barrel and mark ALL material thats touching up against the sides of the barrel. All material that touches the barrel needs to be removed all the way up the the first barrel lug.
Once you've marked the areas that need to be taken down, Remove your barrel. look along your barrel for shiney markings. This is caused by the stock material rubbing up against the barrel. By removing this excess material, You'll remove the pressure thats pushing up against the barrel that leaves these ugly marks.
Black area is the paint/material that i removed. Its better to remove the material evenly so you have a nice clean gap alone the side of the barrel. It doesnt take much filing at all to get the built up material off. Go slowly so it looks clean.
Pictured below is what i'll call "barrel supports" From the factory, the barrel is pressed up against on these and just sits on them. File these down! These cause nothing but headaches and are of no use. On these, you'll need to take off around the thickness of a penny.
Rear Barrel Lug: Does yours have a Square imprint of the barrel lug? If so, You'll need to buy a little JB weld, Mix it up good, And use a tiny screw driver and just carefully filly that square impression and around the entire area. I like to do the entire area as pictured for extra support. If you do not fix this area, The barrel lug will continue to eat into the stock and will case your groups to be in a vertical line.
Dont worry about closing up the hole. You can always use a drill bit and clean it up. You dont need to build it up alot, Just get it flush with the original stock material.
Use a knife to rough up the area so the jb weld has something to grab on to and hold.
Next i simply used a Soda can and used the aluminum as my shimming material, works perfect! Use scissors and cut the shims out to fit tightly into the lug area and use a small dab of rubber cement in each corner to hold them in place.
I use 1 shim in the rear, and 2 shims up front. Remember that the JB weld will take up a little room and depends on how thick you put the jb weld on.
Cut out more shims than you'll need.
Pictured below is engine bearing shim i originally used, This did not hold up no where near as good as the soda can, but was all i had at the time.
Once you get the stock filed, JB welded, <--- let the JB weld dry for atleast 2 days to insure its properly dry.
Take the barrel and place it into the stock with NO shims. Grab a piece of paper and slide it down between the stock and barrel, Take note of tight areas. If the paper does not slide down, Remove the stock, Add One shim to the front and rear lugs. Redo paper test. It should take between 2-3 shims on the front lug and 1-2 shim in the rear. Do NOT crank down hard on the lug bolts, These only need to be snug.
Don't let all this scare you off, Its very simple to do and just requires a little time and very little work.
Keep it simple and start off with marking the areas where material is touching.
Finished result was a Winchester X-150 .50cal that went from shooting 2 1/2" groups with 385 grain Hornady great plains, to a common 5/8" group @ 100 yards with open sights.
Pictured below is the last target i shot with 90 grains pyrodex p and a 410 grain Great plains conical @ 100 yards and truglo fiberoptic sights.

FrontierGander- Admin
- Posts : 519
Join date : 2021-05-25
Age : 40
Location : Colorado -

Tenasaw, uffda and Mustang65 like this post
uffda- Posts : 147
Join date : 2021-07-15
Mustang65 likes this post
» .45-70 Brass, free but for shipping SOLD
» Defarbing a barrel
» What's your favorite inline?
» Helpers Guide to building kit guns: Browning the barrel
» 28" VS 32" Barrel + Precision Packer
» Defarbing a barrel
» What's your favorite inline?
» Helpers Guide to building kit guns: Browning the barrel
» 28" VS 32" Barrel + Precision Packer
Permissions in this forum:
You cannot reply to topics in this forum